

Displaying Sales Orders Report Results
Last updated:
You can display all Sales Orders recorded in the system—either individually for each Warehouse (or branch) or across multiple Warehouses in bulk —through the Sales Orders Report.
Displaying Sales Orders Report Results
- Go to the “Sales” module.
- Open the “Sales Orders Report” page.
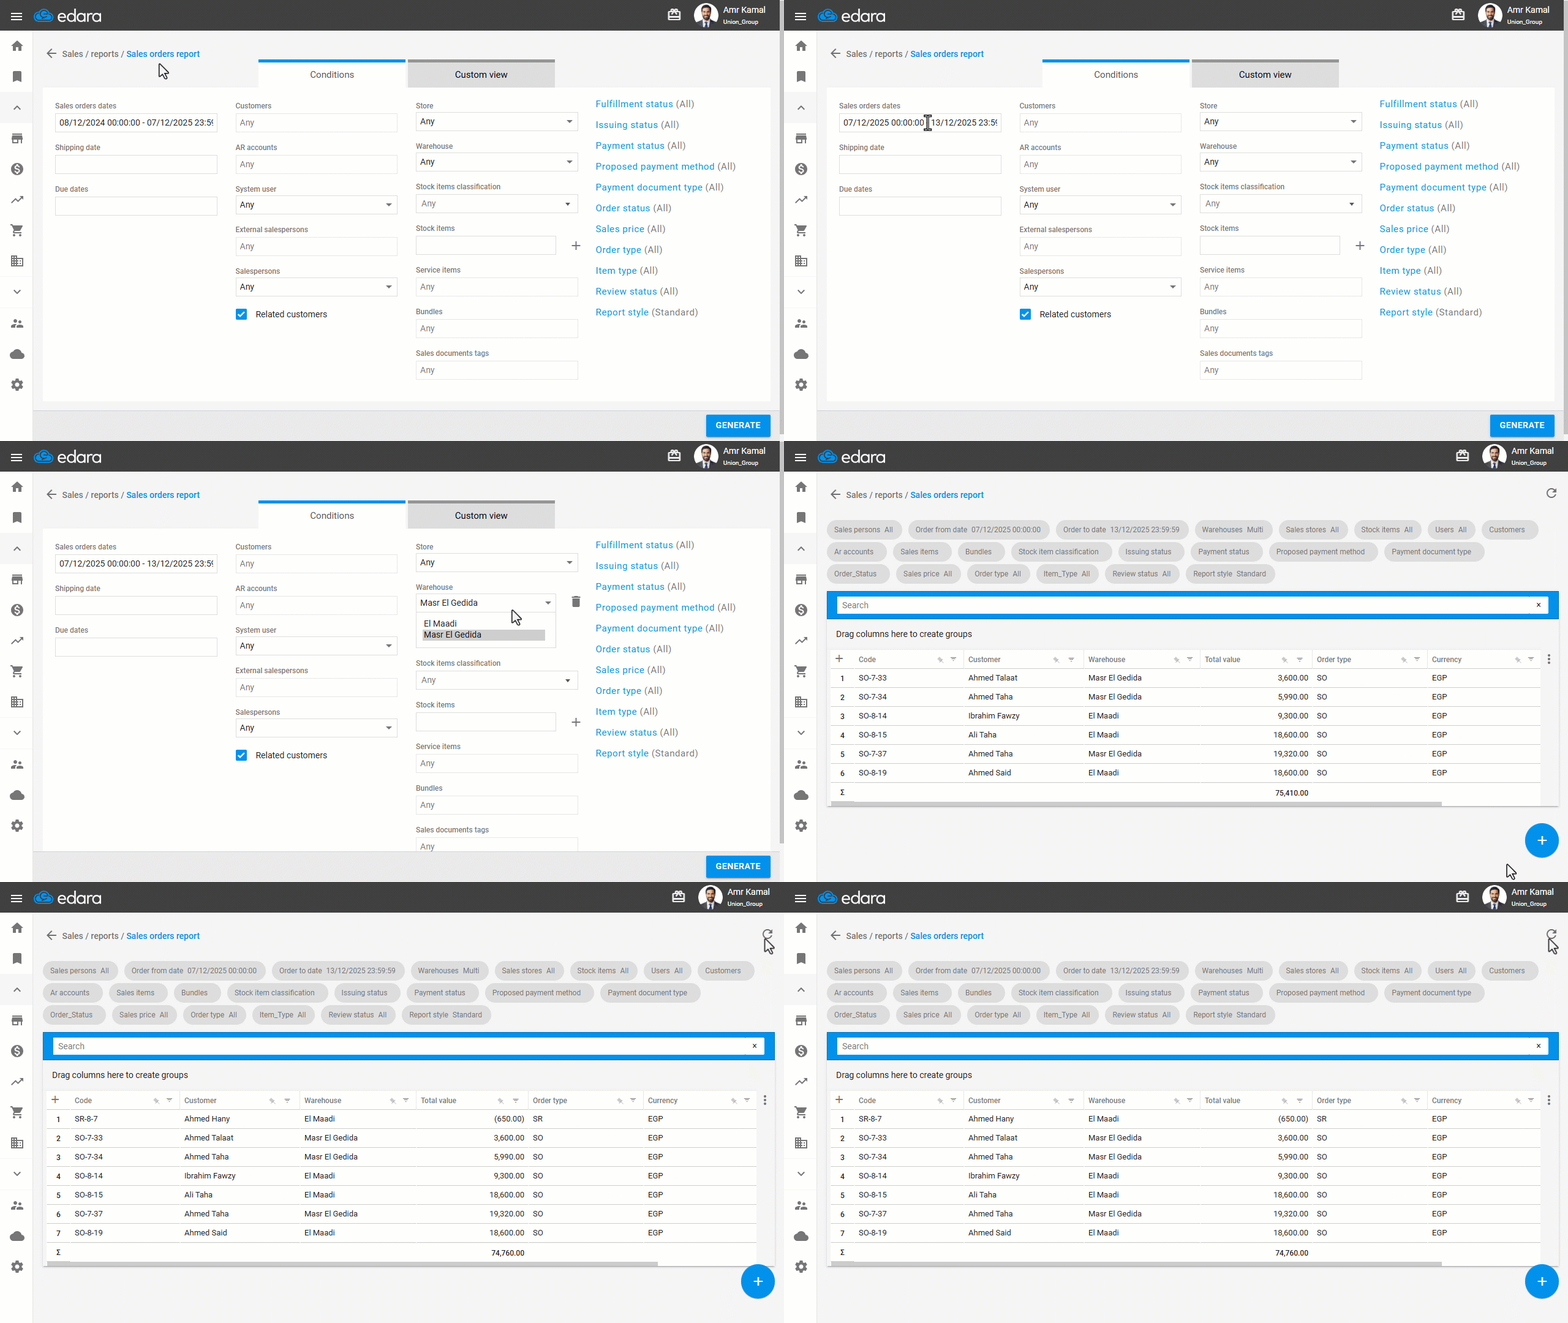
- Select the required date range.
- Choose the Warehouse or Warehouses for which you want to display the report.
When the “Related Customers” option is enabled, the report displays all sales orders for customers linked to the selected salesperson, even if another salesperson created these orders. This option is used when you need to track all transactions of customers associated with a specific salesperson. If it is not enabled, the report will display only the sales orders that contain the selected salesperson.
Note: Order Status is set to "All" by default, which shows all sales orders except canceled ones. To include canceled orders, click on "Order Status" and select all statuses, including "Canceled".
- Click on “Generate”.
You can refresh the report results by clicking on the refresh icon “ ” or using the shortcut (Alt + F5).
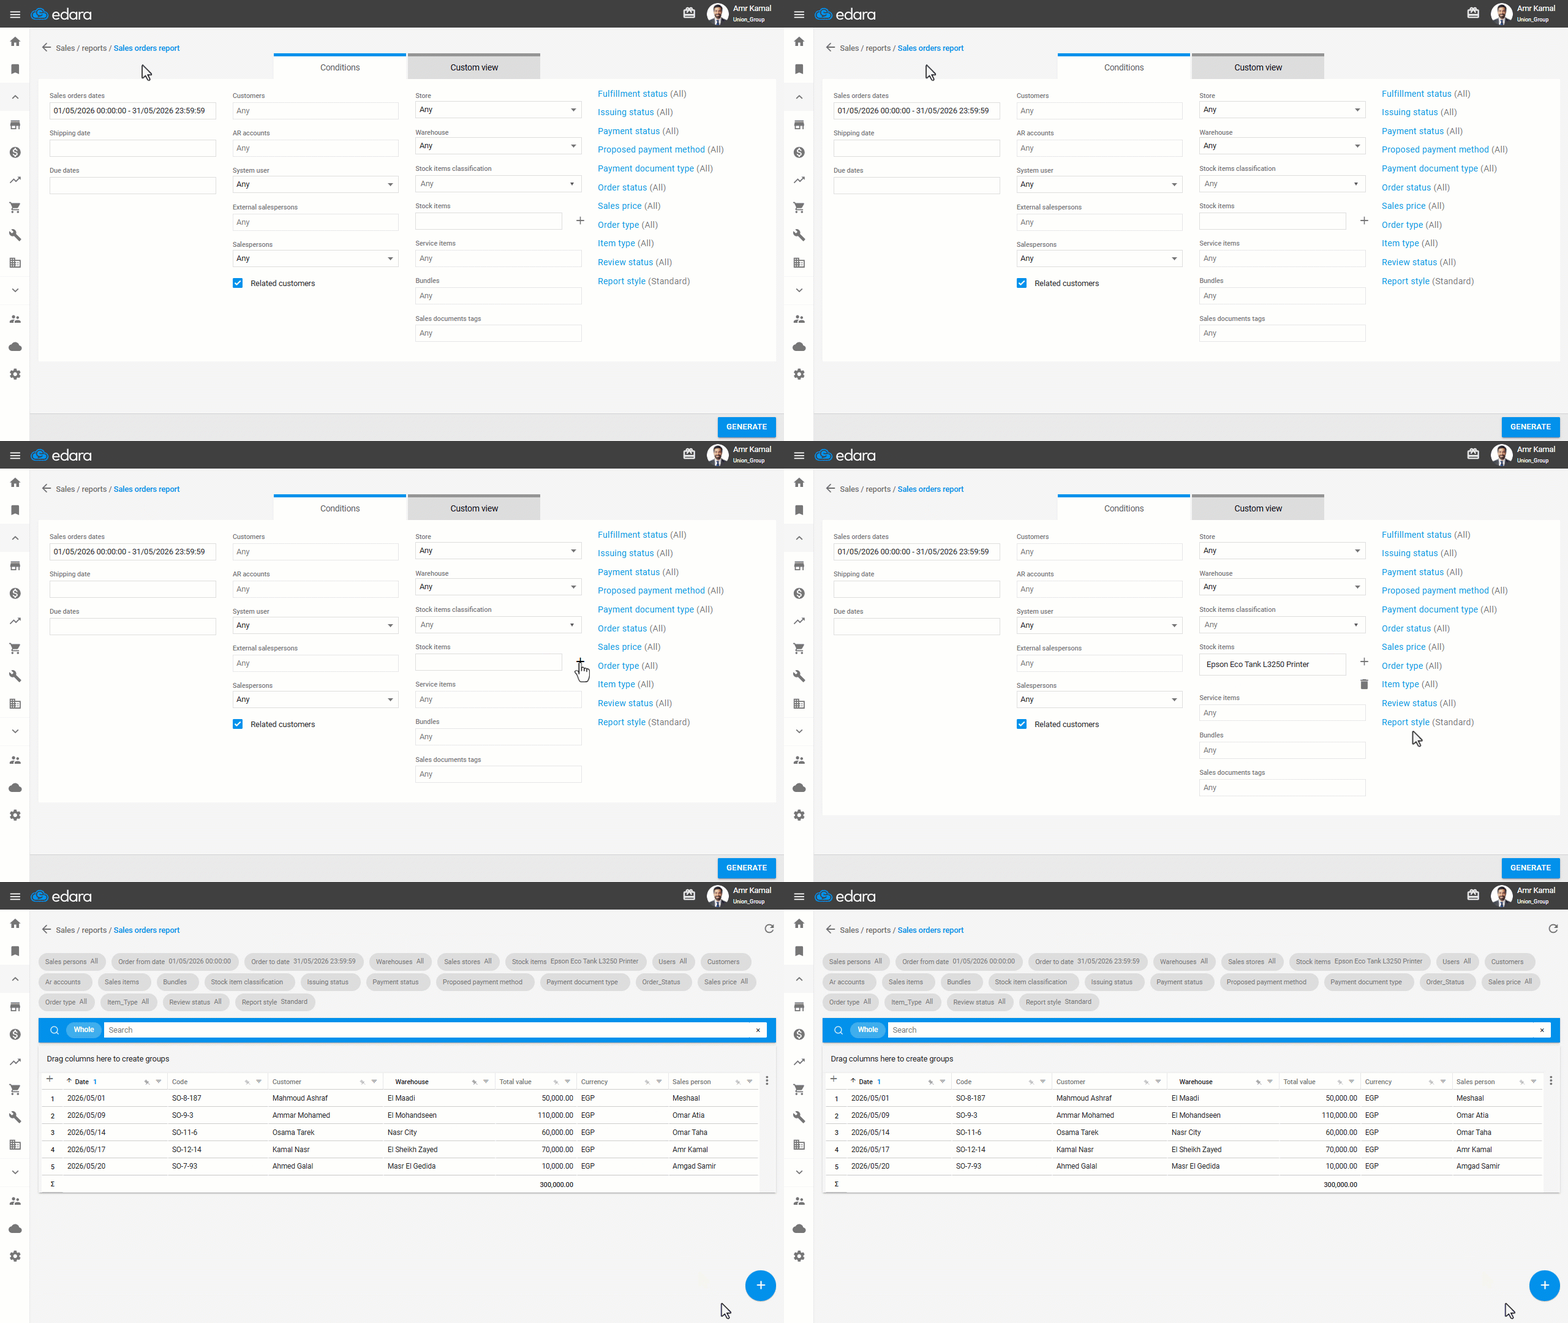
To view sales for specific stock items or track their sales activity, apply a filter on the item before generating the report. Click on the "+" icon next to the stock items option, then select the required stock item.
The system will display all sales orders that include this stock item, whether fully issued, partially issued, or not issued.
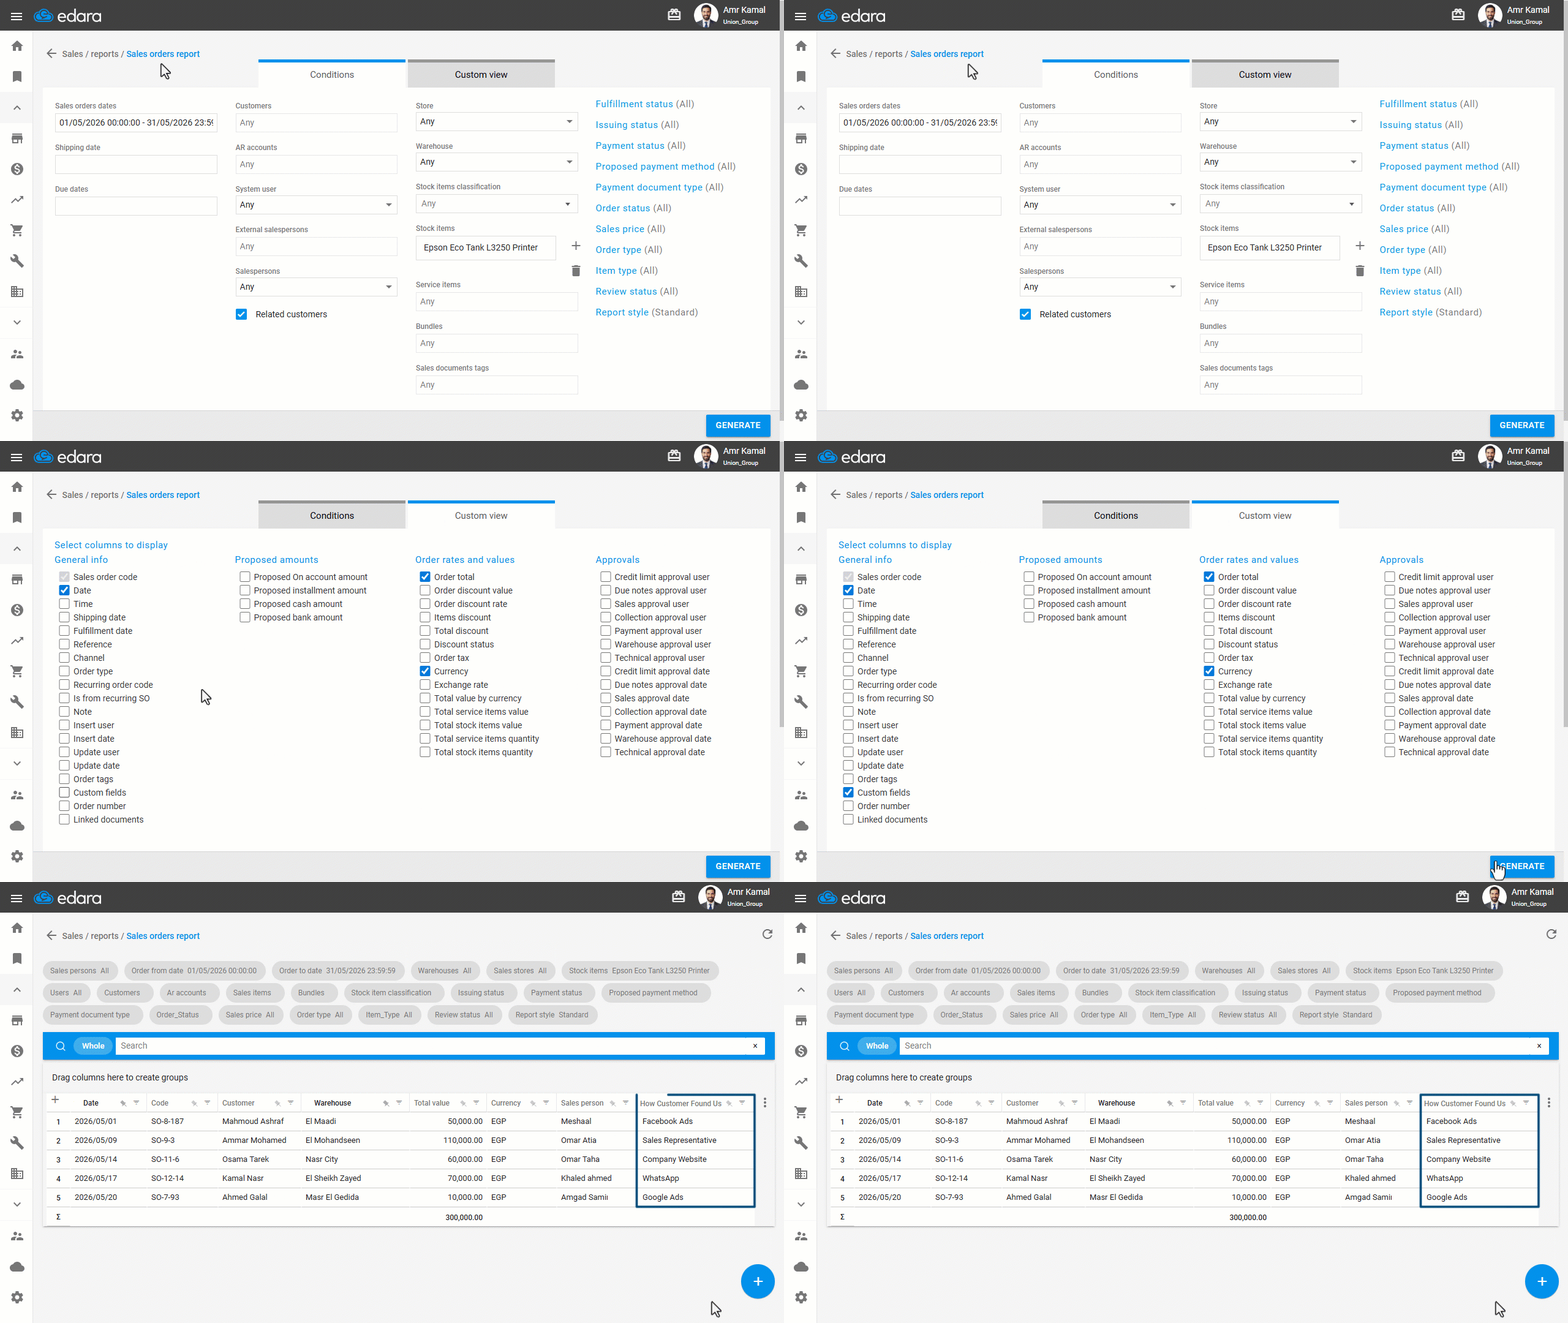
Note: To display custom fields in the Sales Orders Report, go to "Custom view", enable the "Custom Fields" option, then click on "Generate".
Frequently asked questions
Why don’t canceled orders appear in the report?
Order Status is set to "All" by default, which shows all sales orders except canceled ones. To include canceled orders, click on "Order Status" and select all statuses, including "Canceled".
How do I display custom fields in the report?
To display custom fields in the Sales Orders Report, go to "Custom view", enable the "Custom Fields" option, then click on "Generate".
If you encounter any challenges or have questions during these processes, you can contact our technical support team, who are ready to assist you at any time.