

Managing “Data Manager” Permissions
Last updated:
You can manage user permissions within the “Data Manager” and define the features available for each user based on their responsibilities, ensuring that each user can access only the features they are authorized to use.
Managing “Data Manager” Permissions
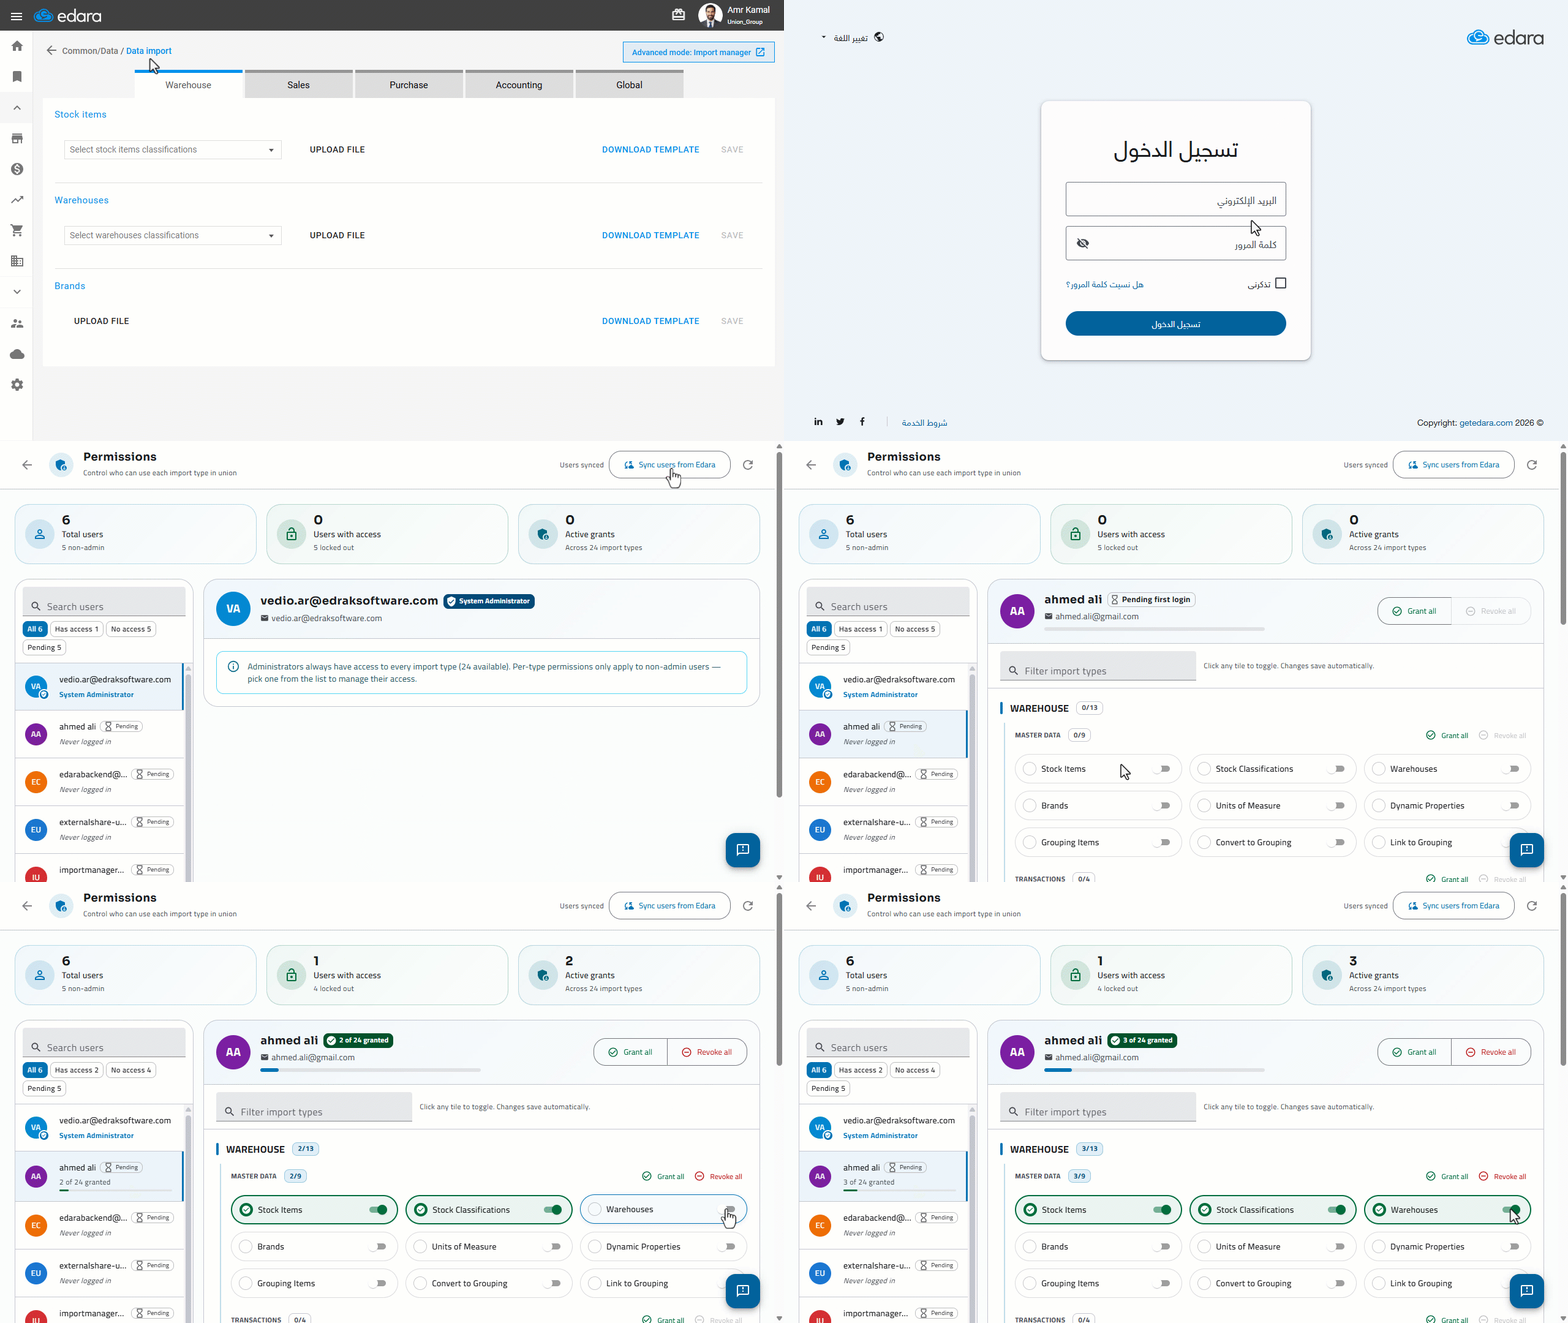
- Go to “Data”.
- Open the “Data Import” page.
- Click on “Advanced mode: Data Manager”.
- Click on “Sign In”.
- Enter your Edara account email and password.
- Click on “Login”
- Click on “
 ” to manage user permissions. This option is available only if you have the “System Administrator” Role.
- Click on “Sync Users from Edara” to import all users from Edara, then manage their permissions within the tool.
- Select the required user. You cannot modify the permissions of users who have the “System Administrator” permission.
- Select the permissions you want to grant to the user.
You can click on “Grant All” to grant the user all permissions, or click on “Revoke All” to remove all granted permissions.
Notes:
- The “System Administrator” has all “Data Manager” permissions by default. Only users with the “System Administrator” permission can manage user permissions.
- When adding a new user in “Edara”, you must click on “Sync Users from Edara” to display the user in the “Data Manager” tool, then grant the required permissions.
Frequently asked questions
Why doesn’t a new user appear in “Data Manager”?
When adding a new user in “Edara”, you must click on “Sync Users from Edara” to display the user in the “Data Manager” tool, then grant the required permissions.
If you encounter any challenges or have questions during these processes, you can contact our technical support team, who are ready to assist you at any time.
Did this answer your question?