

Selecting a Cost Center in Sales Documents
Last updated:
When a sales branch or warehouse serves multiple business activities, projects, or operational areas, defining the cost center at the sales document level becomes more accurate than relying only on the default cost center.
Selecting a Cost Center in Sales Documents
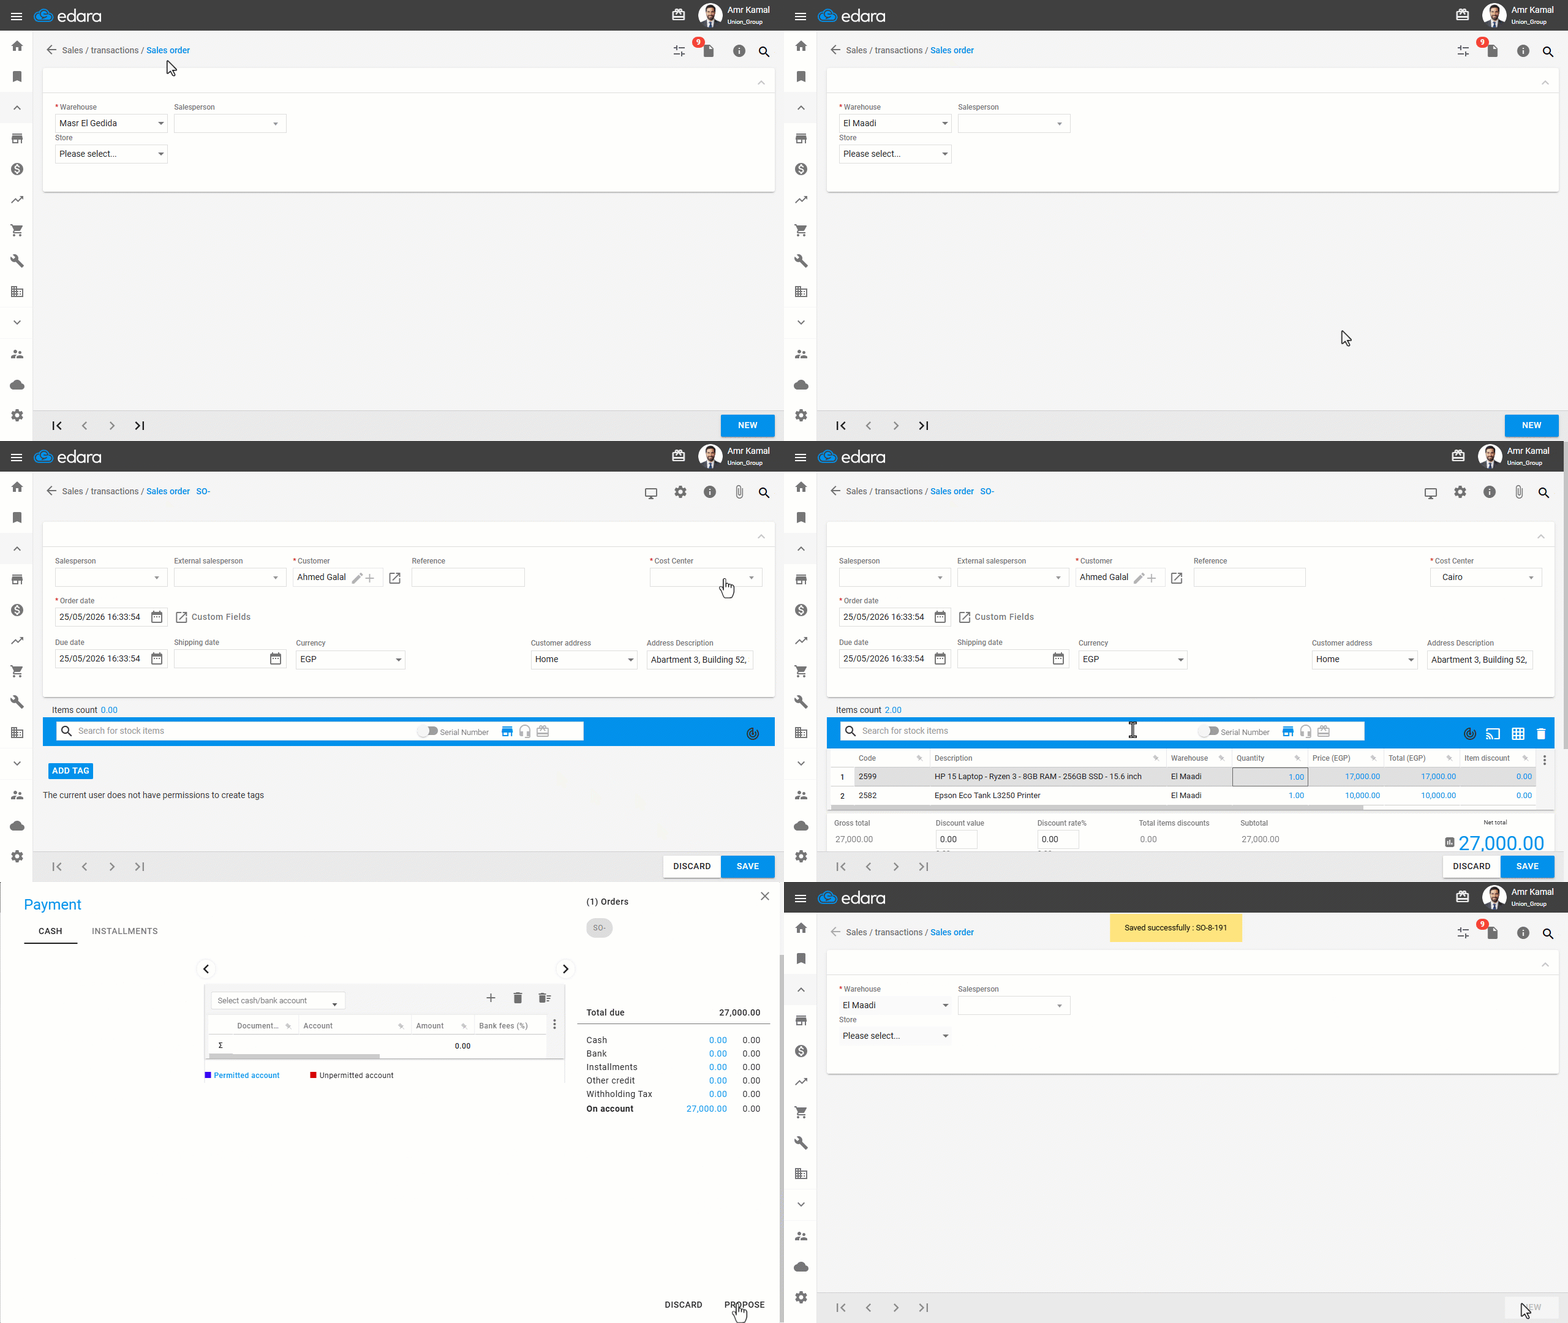
- Go to the “Sales” module.
- Open the “Sales Order” page.
- Select the warehouse.
- Click on “New”.
- Enter the customer name.
- Select the cost center.
A drop-down list appears showing only the cost centers to which the user has access.
- Search for the required stock items.
- Select the payment method by clicking on “💳”.
- Click on “Save”.
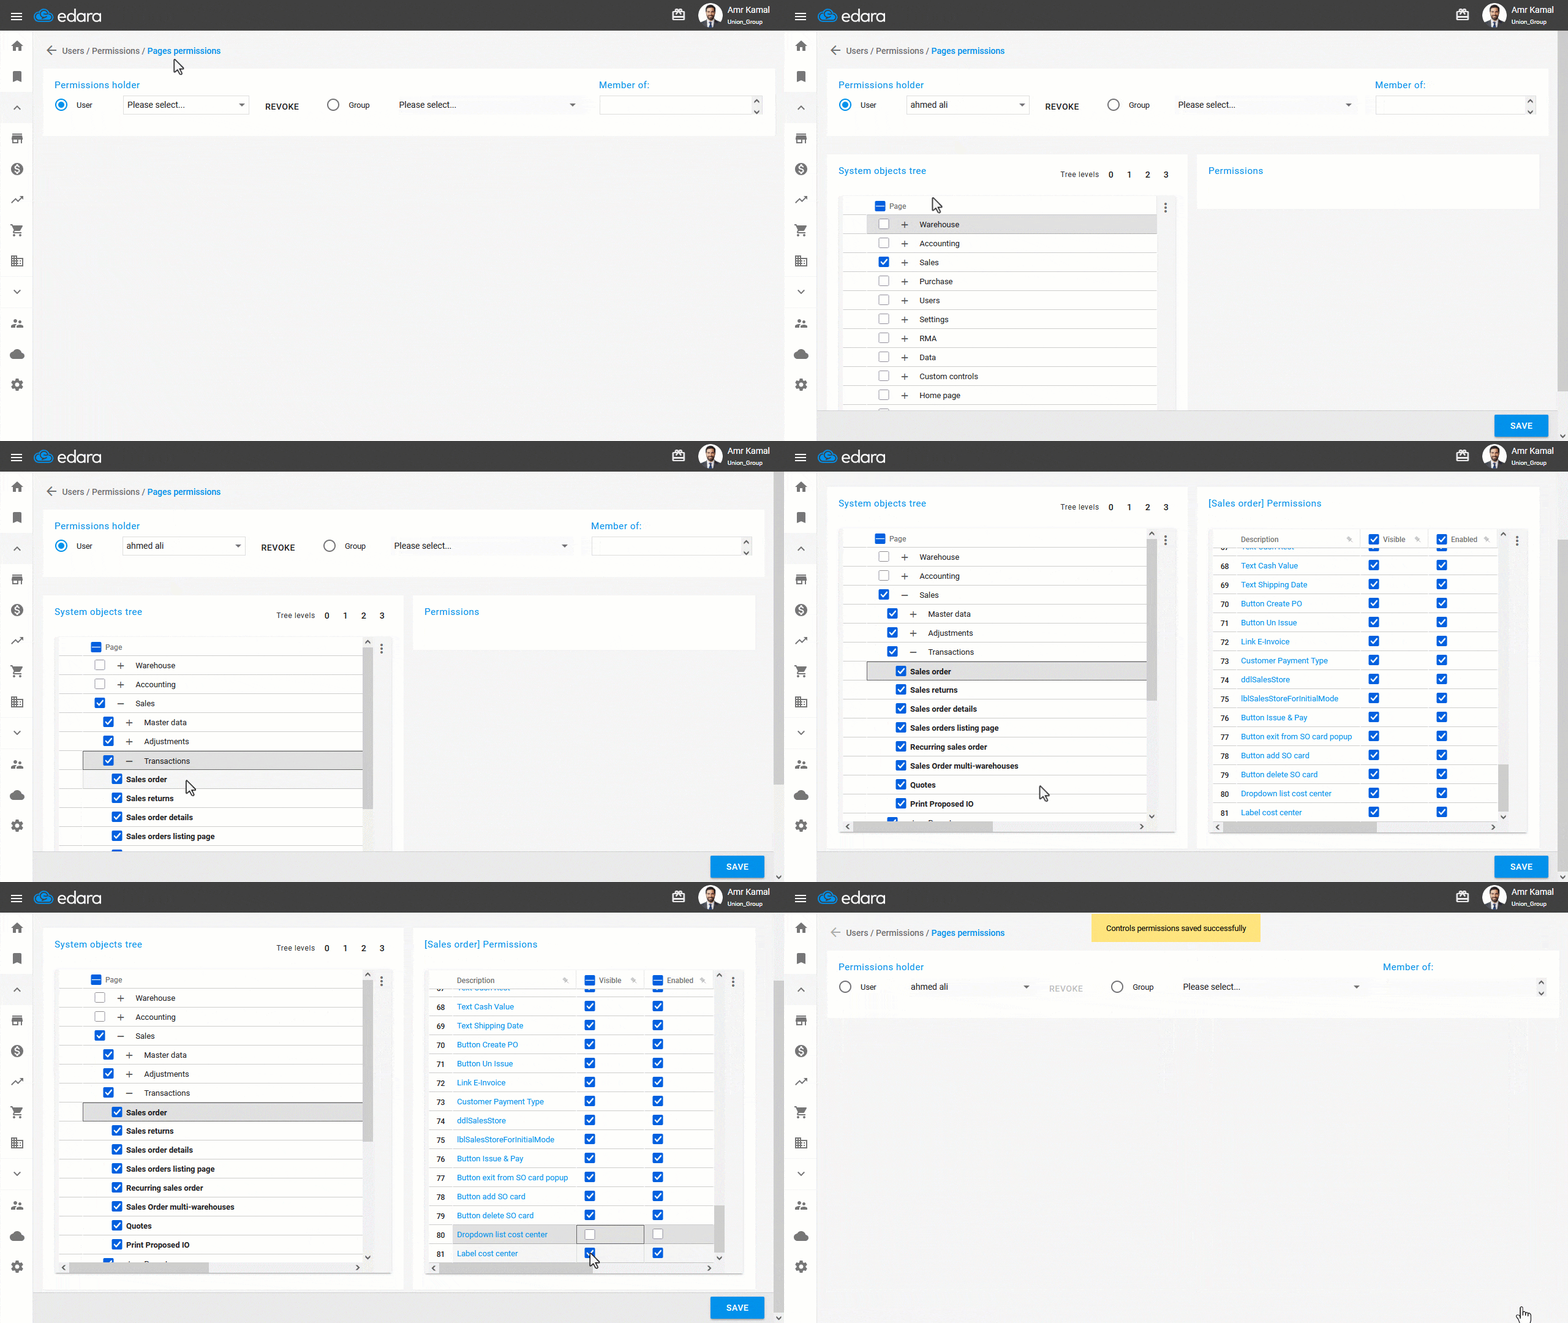
The “Cost Center” field appears by default within the document, and you can control its visibility and editability through the “Dropdown list cost center” and “Label cost center” permissions within page permissions.
Notes:
- You can also select a cost center in the Sales Return document. The field appears empty by default in both Sales Orders and Sales Returns until it is manually selected.
- If the document is linked to a cost center for which the user does not have access, the cost center will appear within the document, and the user can change it to one of the cost centers visible to them in the list, based on their permissions.
- When the setting "Auto-Apply Sales Document Cost Center to Accounting Entries" is enabled, the cost center selected in sales documents is automatically applied to the related accounting entries and documents, but only for newly created documents after enabling the setting.
- When the setting "Enforce cost center entry in sales documents" is enabled, the user will not be able to save or edit the specified documents unless a cost center is selected.
Frequently asked questions
Can the cost center be made mandatory?
When the setting "Enforce cost center entry in sales documents" is enabled, the user will not be able to save or edit the specified documents unless a cost center is selected.
If you encounter any challenges or have questions during these processes, you can contact our technical support team, who are ready to assist you at any time.